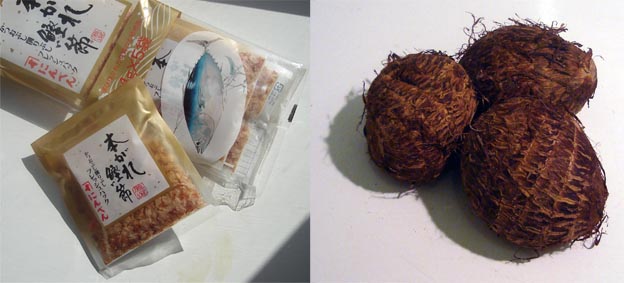
 A few weeks ago I got a very nice surprise as I received a parcel from Anna at Baking for Britain. Anna was my allocated person for EBBP4 and I some of the ingredients I sent her were for making Japanese food including dashi (seastock). However, my ingredients were incomplete and contained no bonito flakes as just can’t get everything in Dundee. These flakes are made from the dried flesh of the bonito (skipjack tuna) which has been repeatedly smoked. This is then shaved into flakes and mainly used for adding a smoky, fishy flavour to stock or as garnish for a variety of dishes. Anna very kindly found some in for me in London and this was the parcel that arrived, 5 precious little bags of bonito flakes (or katsuo bushi as Anna discovered from the Japanese shop owners).
 So I wanted to make something a bit more special then just stock and decided to make okonomiyaki. Okonomiyaki is what they sometimes call Japanese pizza, as you can vary the topping but it’s more like an overly filled omelette. The first time I had one was years ago when one of my Japanese colleagues in Dundee organized a pot-luck dinner party, Her contribution was an okonomiyaki and I remember being amazed at the topping. The omelette is garnished with katsuo-bushi and as the flakes are so thin, they seem to “dance” on top of the omelette as they sway in the hot air.
Then whiles living in Japan, we would sometimes go to restaurants specialized in okonomiyaki. These are very fun places as all the tables have a hot plate built in and you order the premixed ingredients but get to cook the whole thing at your own table. However, after dinner there, you are definitely in need of a shower as you stink of frying but it’s well worth it.
 So I got the recipe from the book Untangling my Chopsticks, a book I absolutely love and recommend if you are interested in Japanese food and the culture involved. The recipe is very simple, you just chop and grate all the veg and meat (or you can of course make it vegetarian, mix everything and then start frying them. You only use one egg, which doesn’t look like much, but it gets it’s lovely creamy golden texture from the grated taros (also known as Japanese mountain yams or satoimo). To eat, you garnish with okonomiyaki sauce, mayonnaise, katsuo-bushi and nori (seaweed) flakes and pickled ginger. Okonomiyaki sauce is actually based on Worcestershire sauce so you can use this as a replacement. Worcestershire sauce came to Japan in the second half of the 19th century but the flavour has been made milder to suit the Japanese palate. I couldn’t find the right pickled ginger so used gari (that you use for sushi) instead which doesn’t really matter flavour wise, although the other one does taste a bit stronger. I’d also run out of mayonnaise. As I had to make dashi for this recipe, I used one of the bags for that and then “recycled” the used bonito flakes by dry frying them with some soy…this makes a great sprinkle over rice. The rest of the dashi I used for making miso soup the following day. When frying the omelettes, the smells made me all nostalgic about Japan. Once again, the fish flakes danced on top and the taste was perfect.
Okonomiyaki (makes 2, serves 4)
1 cup all-purpose flour
1/2 tsp (0.5) tsp baking powder
1/4 tsp coarse salt
1 1/2cup dashi
1 large egg
1 cup grated taro’s
2 cups coarsely chopped green cabbage
1 cup fresh bean sprouts
1 medium carrot, peeled and shredded
1 bunch scallions(±6) trimmed and thinly sliced
2 tbsp vegetable oil
4 ounce boneless, skinless chicken breast, thinly sliced into small pieces
10 medium shrimp, peeled, deveined and sliced lengthwise in half
for garnish
mayonnaise
okonomiyaki sauce (can substitute with Worcestershire sauce)
shredded red pickled ginger
dried bonito flakes (katsuo-bushi)
shredded nori
Mix flour, baking powder and salt in a large bowl. In a smaller bowl, whisk together dashi and egg, then add the grated taro’s. Add this wet mixture to the dry, whisk until the batter is smooth and add all the vegetables. Heat a non-stick skillet on medium-high, brush a tablespoon of oil on the surface and, when hot, put half the mixture in the pan. Spread this out till about 8 inch wide, scatter half of the chicken and shrimp on top and press them into the surface. Reduce the heat to medium-low and cook the pancake for about 4 minutes until the top edges appear cooked and the bottom has stiffened. Turn the pancake and cook for 3-4 more minutes until the other side is golden. Repeat this process with the remaining oil, batter, chicken and shrimp.
Cut the pancake into wedges and let people garnish their individual wedges. First spread creamy mayonnaise on top, followed by okonomiyaki sauce. Next, scatter some ginger shreds, bonito flakes and finally add a generous pinch of nori on top.
No comments:
Post a Comment