Showing posts with label Sweets. Show all posts

Thursday, November 22, 2007

On Snow, Parsnips and SHF


How fitting that my 100th post is about one of the most perfect days I've had in a long time! Last Sunday I went to the mountains in my friends new camper van. After an early start we arrived in Lauterbrunnen, took the gondela up and walked to Mürren. This is why I moved to Switzerland!

The weather was perfect, sunshine, blue skies and the most amazing snow I've ever seen! About 70 cm deep and covered with a layer of crystals several cm big, they were like little Christmas trees. We made a beautiful walk, played in the snow, built mini snowmen and ate lunch in the sunshine.


When it comes to walking food, I'm just not one for sandwiches. I always find that by the time you get to eat it its squashed, cold and often tasteless. Therefore, I prefer home baked lunches, preferably with nuts and cheese for lots of flavour and energy. For this walk I used parsnips as they are back in season! I developed quite a liking for this root vegetable whilst living in Scotland. Before that I'd never even seen a parsnip as they are very hard to come by. However, this year the local supermarket has started selling them as an "ancient vegetable" so we'll hopefully be eating a lot more of them. I know parsnips mostly as a savoury vegetable but they also go well with sweet (think honey roasted) flavours and I'd heard that they can also be used in cakes, like carrots, but that this somehow fell out of fashion after the WWII.

I adapted this recipe (a firm favourite for summer walks) as I wanted to make a savoury and a sweet version to take along and use some of the walnuts from my parents garden. They were a great success. For the savoury I used gruyere, walnuts and fresh herbs (rosemary, sage and thyme), whereas the sweet ones had raisins, nuts, nutmeg and ginger. Both yummy and with lots of energy to keep me going on the walk, hopefully the season will be good, there will be many trips and I can make them loads. This post my entry for this months sugar high friday - The Beta Carotene Harvest - hosted by Definitely not Martha


Sweet or Savoury Parsnip Muffins (makes 6)

1 cup flour
1/3 cup buckwheat flour
1 Tbsp baking powder
3 eggs
2 parsnip - grated
1 tbsp creme fraiche
1/2 cup vegetable oil

Sweet
60g raisins
60g walnuts - chopped
1 tsp cinnamon
1/2 tsp ground ginger

Savoury
60g gruyere - grated
60g walnuts - chopped
2 tbsp fresh herbs
salt and pepper to taste

Heat the over to 180°C, in a large bowl, mix the creme fraiche, oil and eggs. Then stir in the flour and grated parsnip. Finally, add the extra fillings and the spices. Or at this point you can divide the mix in two and make both (make sure to halve the amounts given above). Pour the mixture into buttered molds and top with either raisins or walnuts. Cook for 30 min or until a needle comes out clean. Leave to cool and enjoy!

Wednesday, November 07, 2007

Nigella's express mousse


I'm not sure if you've been watching the most recent Nigella Lawson series? Titled Nigella Express she promises you ideas to make good food fast with her usual "fantabulous" style. Don't get me wrong, I watched every episode but can't help feeling a bit cheated after every show. Yes, the recipes she shows are fast and no doubt tasty but a lot if somehow pre-made or bought and for me it takes the joy out of cooking a bit. Plus all the hair-flicking, flirting with the camera and vocabulary seems a little out of place to me.

Not that I want to slave over a hot stove every time but when having a dinner party, it's nice to make a bit of effort. But I appreciate that I can be a bit of a masochist when it comes to these things and she definitely has some nice ideas. I've become pretty addicted to her bean mash and when she made her no worries chocolate mousse, I knew I had to try it as I had the perfect occasion/audience.

A friend of mine has been organizing girlie weekend get-togethers in the Lake District for the last 4 years. They are weekends to catch up with her friends (and mine both from before and through this) and they are always fabulous. How often do you get the chance to spend a weekend with up to 20 women your own ages from all backgrounds, nationalities, professions in a wonderful setting?! Most make it every year and we chat lots, walk, have been known to treasure hunt and eat and drink lots of nice things. On Friday night it's casual pizza but on Saturday night all the stops are pulled out for a pot luck dinner. Everyone always makes a real effort and there is always to much food.

And this year was no exception, as I was traveling from Switzerland this year, I didn't want to make something very complicated but still wanted it to shine and I figured these would do the trick. And indeed they are a breeze to make (although I was a bit worries about pouring the hot chocolate mix into the beaten cream which totally deflated of course), set very fast and tasted lovely although it was incredibly rich and perhaps a bit too much after a 4 course meal! I paired them with some wafers inspired by the Essence cookbook I bought recently (fantastic! a definite recommendation and will blog about it soon!). These are very easy to make and look spectacular. The perfect dessert for another perfect weekend, I already look forward to the next one.

Rice paper and cocoa nib tuiles
50 g sugar
50 ml water
rice paper (from Asian supermarket;the white ones for making fresh spring rolls)
handful of broken cocoa nibs (or anything you want to use)

Boil the water and sugar together to make a syrup, then leave to cool. In the mean time line a baking tray with parchment paper, cut the rice paper into pieces and dip one into the syrup. Place it on the tray and sprinkle with some cocoa nibs. Repeat this process till you run out of rice paper. Dry these tuiles in the oven at 80°C for 3-4 hours, they will keep in an airtight container so are easy to make in advance.

And for the people who wanted the flat bread recipe:
Flatbreads (±15)
2 tsp dried yeast (or 30g fresh)
450-475 ml water
750 g strong white flour
2tsp fine sea salt
black pepper freshly ground
50 ml olive oil
extra flour for rolling

Start about 2-3 hours before required and you need quite a bit of space to make these. First mix the flour, salt, pepper and olive oil then add in the yeast and mix well. Finally stir in the water bit by bit to make a soft dough that leaves the sides of the bowl clean. Knead for about 10 min till elastic - you can do this by hand or with a mixer, whatever you prefer - cover the bowl with a lid/moist towel and leave to rise in a warm place. to speed things up you can partially fill the sink with lukewarm water and place the bowl in there. Alternatively, heat the oven to 50°C, turn it off and place the bowl inside. When the dough has doubled in quantity, knock it back and divide in to 15 pieces. Roll each piece out on a floured surface shaped like a large pita bread. Cover loosely and leave to rest for 3 min. Barbecue over fresh hot coals for 1-2 min each side (the bubbles that pop up are great!). You can also try making them in the oven as it's not really barbecue weather, I would guess at 225°C for 4 min each side. If you can use a pizza stone that will make them puff up nicely.

Wednesday, October 24, 2007

Pumpkins and apples


A very brief and quick entry as I'm off to Paris for my fellowship interview tomorrow!! There is still so much to prepare but I just need a break as I feel my head will explode with science! I'm also very excited about Halloween and Stephanies Blogpary this month. Although it's not one of the traditions of the Netherlands, I think it's a fab holiday. Dressing up, trick-or -treating, lots of candy, scrummy food and a spooky atmosphere make for a perfect party I think. On top of that I can't get enough of pumpkins at the moment - Barry jokingly says I will turn into one soon, but who cares! They're tasty and healthy and lovely I think, and my friend Simone agrees which is why we have a whole Halloween pumpkin dinner planned for next week complete with pumpkin soup, bread and ice cream! However, first I have to get tomorrow out of the way and then I can focus on the kitchen again.

Anyway, back to the treats for this week: I made these little biscuits I discovered here (the beauty of online translaters) on Sunday as was very taken by them. First, they are easy to make. Second, they look beautiful and third, they have a lovely texture, crunchy without being hard or dry. I added some cinnamon and ginger for a more autumn taste which was nice and complemented the subtle pumpkin flavor. A perfect treat served along some hot mulled apple juice (put apple juice in a pan with some cinnamon, cloves and star anis, heat for about 5-10 min to let the flavors infuse) and to keep the brain going till tomorrow.

Little Sweet Pumpkins
(makes 12)
30g cooked/roasted pumpkin
30g butter
25g sugar
pinch Salt
60g soft flour
2g cornstarch
pumpkin seeds

Cream butter and sugar together, when this is light and fluffy, add the salt and pumpkin. Mix well again and finally incorporate the flour and cornstarch. You should have a dough that is relatively firm but does not crack and leaves the bowl clean. Wrap in clingfilm and leave to rest in the fridge. Divide the dough into 12 parts, roll each of them into a small ball, flatten slightly to give a pumpkin shape. apply marks to the side with a toothpick and insert a pumpkin seed as the stem. Bake 17-20 min at 170°C.

Thursday, October 11, 2007

Poppy overload!

A quick one as I'm off to the lake district tomorrow for a girly weekend with friends from Dundee! I'm looking forward to it very much as there will be lots of chatting, walking, relaxing and nice food. But I'll blog about that next time. The post now is one I promised to my brother who was visiting last week with his girlfriend. It was so nice to see both of them (last time was in March) and spend some quality time both in Basel and the Alps. Tuesday night was their last evening in Basel and so we cooked the first fondue of the season. For dessert I wanted to make something special and decided to open one of the jars of poppy jelly I made in July.

I was intrigued from the first moment I saw this recipe and knew I had to make it. So I set out one afternoon, gathered way too many leaves and spent hours cleaning all the pollen off (it pays off to be a bit more careful in the picking, then you'll have a lot less work). I made three jars of beautiful red jelly that then disappeared into the cupboard and came out again last Tuesday night. The taste of the jelly was strange but nice, not very strong but also not like anything I'd ever tasted. I decided to pair it with a panna cotta and to prevent it from all being too jelly-like (and stick with the theme) I added poppy seeds which collected at the bottom (=top after inversion) of the mold. They formed a nice contrast both in colour and in texture to the creamy panna cotta. I just thinned out the jelly (2 tbsp with one tbsp water) by heating it and drizzled some over/around the pudding.


Poppy Panna Cotta (serves 4)
200ml Double cream*
200ml Single cream*
60g sugar
1/2 vanilla pod
2 tbsp poppy seeds
level 1/2 tsp agar-agar**

Mix cream, sugar, poppy seeds and agar-agar in a pan. Scrape the seeds from the vanilla pod into the cream and throw the pod in. Gently bring to the boil and cook for 1-2 min. Leave to cool slightly, then pour into individual molds. Leave to set in the fridge for at least 4 hours.

* This was just what was in the fridge but you could use double cream and milk or all single cream or whatever you feel like.
** I find it easier to just have this at home for when vegetarian friends come for dinner, you could also use gelatine in which case you need 1 1/2 sheets.

Thursday, September 27, 2007

Hay Hay it's Donna Day #15


A last minute assembly tart for this months edition of Hay Hay it's Donna Day hosted by Sarini from Trinigrourmet. We're about to leave for a long weekend in Paris to see some rugby, take in some culture, do a bit of shopping and eat lots of nice food.

I've been using a lot of chickpea flour lately but mainly in savoury dishes but wanted to try a sweet version as well. So along with the half pomegranate at the back of the fridge I thought they would make the great basis for an Arabic/Mediterranean inspired tart. I made a simple dough using chickpea flour (200g), butter (75g), sugar (2 tbsp), ground green cardamom (1 tsp) and a bit of water. The dough does not "come together" as there is no gluten in this flour so I just divided it over 4 buttered mini pastry cases. These were baked 15 minutes at 180°C and in the mean time, I diluted some Membrillo with a bit of water to make it into a softer paste. I spread this on top of the case, then applied a thin layer of ricotta, dusted this with more ground cardamom and finally sprinkled pomegranate seeds on top. All done in 25 minutes.

The tart was beautiful to look at and the taste pleasantly surprised me. I know you can't go far wrong using all good ingredients but still, it turned out better then expected. The nutty crust combined perfectly with the sticky sweet quince paste and the creamy ricotta whereas the pomegranate seeds provided a nice tart and fresh contrast. Definitely worth a repeat performance.

Update: the round up has now been posted....what a fabulous collection of tarts! A lot of inspiration/yummy things there to try out soon

Monday, September 24, 2007

SHF #35 - The Beautiful fig

A very last minute entry for this month's SHF but when Ivonne announced the theme for Sugar High Friday as "The Beautiful Fig" I just knew I wanted to take part. Lack of time due to too much work and the breaking of our camera have cramped the blogging a lot lately (it's amazing how less nice the blog looks without pictures). But this seemed a worthwhile entry and I even managed to take a crappy mobile phone camera picture!

I was never a big fan of figs, for years, my mother tried to tempt me with fruits from the tree in our garden but something in the texture put me off. Then I moved to the UK and somehow developed a taste for them (still not quite sure where) but there they were hard to find. So moving here has been a fig paradise!

Basel has been swamped the last few weeks with yummy (and beautiful) figs from France and Italy and I've been eating my fair share. In my yoghurt for breakfast, as part of a chicken stew or in a fancy tart, they always taste delicious. But one of my favourite ways (that works very well with figs that are not quite ripe yet) is to just fill a small frying pan with figs, drizzle a bit of honey over them, a few tbsp of water and add some crushed green cardamom seeds. Leave this to simmer for 10-15 min till the figs are nice and soft and the liquid has gone syrupy. Enjoy this with yoghurt, quark or some ice cream.

(The roundup can be found here)

Saturday, August 25, 2007

SHF #34 - going local!

Moving to a new country can be quite a shock to the system. You have to deal with a new language, culture and customs whilst settling in, looking for an apartment and finding which isle has what in the supermarket. Lucky for me when I moved here, I spent the first two weeks living with a colleague (and now close friend) of mine who helped Barry and me settle in so much here in Basel.

She made me feel really at home in her apartment, translated house adds, helped me to make viewing appointments (my German is ok but I often struggle with Swiss-German), introduced us to Fastnacht and fed us our first cheese fondue in Basel. We also spent evenings baking Christmas biscuits together and made many nice walks in the Jura. Without her it would have taken us a lot longer to settle in and we forged a great friendship in those two weeks (and since then). I think it helped a lot that we share a love for the outdoors and great food and I'm learning lots of Swiss recipes from her. One of them is this red berry meringue tart that is her signature dish. The recipe came from her mother and before that I don't know. I thought it a very fitting entry for this months SHF hosted by Johanna as for me it will always remind me of Basel and settling in here.

You can only make it for a few months in summer as in Switzerland the produce is extremely seasonal (and even regional!) but it is delicious. A buttery nutty crust filled with a mix of tart red berries and a fluffy sweet meringue. Its very fresh and looks beautiful (although unfortunately no pictures due to death of digital camera). This year, I will also try to make it in winter by freezing some red berries to use and perhaps substituting them for cranberries.

Simone’s red berry meringue tart
Fort he crust
-200g butter
-100g sugar
-300g flour
-1 egg
-2tbsp ground almonds

For the filling
-3 egg whites
-130g sugar
-1 Tbsp ground almonds
-500g red berries
Mix the ingredients for the crust together, roll it out and place into a buttered tart dish.Bake this blind for 15 min 190°C. In the mean time, whisk the egg white till thick and add the sugar slowly. Then stir the in ground almonds and berries. Pour the mixture into the base, first bake 10 min at 190°C. Then reduce the oven temperature to 160°C and bake for a further 20-25 min.

Tuesday, August 14, 2007

Brownie Babe Nr. 3


After my disappointing brownie last time, I decided not the divert from the tried and trusted recipe anymore. For the third edition of browniebabe hosted by Myriam I have made this recipe as long as I can remember, I would bring these to school for every birthday or special occasion and know the proportions off by heart. But even though they're great, I felt they needed to be jazzed up a little bit for this event and this is where it all started to go horribly wrong...

You know when you have (what you think is) a brilliant idea and you're so chuffed with yourself for having it that you fire straight ahead without giving it another thought....and then in hindsight you can't believe how stupid you were...well that's kind of what happened to me. I somehow decided it would be great to make honeycomb brownies. I saw someone making the stuff recently on television where it looked really easy and fast plus I love the stuff. Off I went, melted sugar, golden syrup and once caramelising added the bicarbonate soda...no problem...let it cool, chopped it up and put it in the batter....easy peasy....put it in the oven and went away. After 30 min I suddenly smelt this terrible burning, the whole flat was cloudy, so what had happened?! Of course it had kept rising as it had so much bicarb in there...duh!! So it rose higher and higher, flooded over the tin and onto the heating element at the bottom of the oven...damn! Still can't believe I didn't think of that!

Anyway, lesson learned so for the second batch I was a bit more conservative. I'd bought some Kumquats so added these as you can't really go wrong with the chocolate orange combination. To enhance the citrus flavor I also added some Yuzu juice and powder that I picked up when I was in London in May. I love the taste of this Japanese fruit which is a bit more bitter and tart than an orange but not as harsh as a lemon. I also simmered some left over kumquats with honey and Yuzu juice to drizzle on top. The brownies turned out perfect and were squidgy and moist as usual with bits of kumquats for a change of texture and taste. They're a bit bitter/tart, as was the Yuzu but this was nicely complemented by the sweet honeycomb I'd sprinkled on top.

Kumquat and Yuzu Brownies
175g butter
450g sugar
50g good quality cocoa powder
4 eggs
250g flour
1 tsp baking powder
ping of salt
24 kumquats
1 tbsp Yuzu juice*
1 tsp Yuzu powder*

Melt the butter in a large pan, add sugar and cocoa and mix well. Then stir in the eggs and sift in the flour, baking powder and salt. Finally add in the kumquats and pour into a bog baking tin. Bake 30-45 min at 175°C and take out once a knife comes out clean.

Leave the brownies to cool and in the mean time make the honeycomb using this recipe (I halved the amount) and the syrup by combining 2 tbsp honey, 2 tbsp Yuzu juice 15-20 chopped kumquats. Leave to simmer for about 5 min, cool slightly and drizzle over the still warm brownies.

* optional as not very easy to obtain, try Japanese supermarkets for it.

Sunday, July 29, 2007

Apricot and Pistachio Datschi


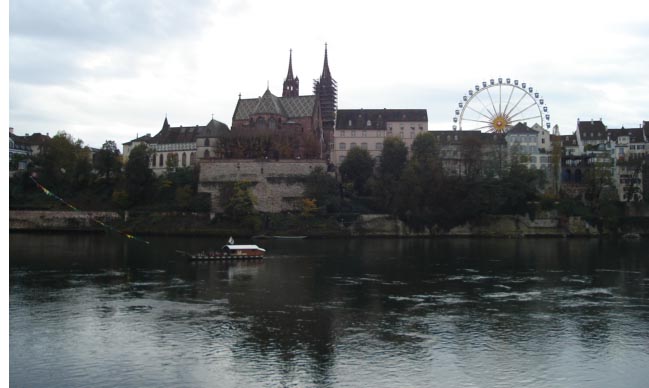
So, I found myself with another excess of fruit...not as"bad" this time but still a few kilos of apricots to deal with. I really fancied an apricot tart, had a look trough my books and made one where you make a pâte brisée sprinkle it with ground hazelnuts and layer the fruit on top. It was nice, but not what I wanted as I felt something more soft and spongy would be better. So I tried a recipe my mum sent me a while ago for and zwetschen datschi. Very easy and very tasty! I decided to add an Arabic hint with some rosewater and pistachios which worked well although the rosewater was very subtle. Also, I might add some ground cardamom next time. Baking really brings out the sweetness of the apricots that were nicely enveloped by the airy dough and the lemon rind added a nice freshness.I took it to a friends barbecue where it didn't last long and was enjoyed with fab food, Prosecco, some Rhine swimming and a stunning view of the Munster

Apricot ad Pistachio Datschi
125g butter
75g + 3 tbsp sugar
2 tbsp rose water
1 egg
pinch of salt
rind of 1 lemon
1 tbsp sour cream
200g flour
1 tsp baking powder
500g apricots
50 pistachios

Wash the fruit, cut them in half and set aside. Roughly chop/grind the pistachios with 3 tbsp sugar. Melt the butter and mix with the sugar, rosewater, egg, salt, lemon rind and sour cream, then sieve in the flour and baking powder. Mix well and spread over the bottom of a baking tray, layer the fruit on top and finally sprinkle with the nut/sugar mixture. Bake 30-40 min at 200°C.

Sunday, July 22, 2007

More dumplings

Johanna definitely started something with her dumpling challenge! At the time, I was sure which ones I wanted to make and they were great, but ever since then I've started to crave more. One of the first other recipes I tried was one I saw ages ago on the first blog I ever read. I was living/working in Tokyo at the time and totally obsessed with anything to do with Japanese food. So whilst looking for recipes I came across a blog. Not quite sure what they were yet but became sucked in quickly by the beautiful pictures and variety of recipes and started reading on a regular basis. Then one day, this post appeared and I really wanted to try it but was in the middle of moving continents, looking for apartments and trying to settle into Scottish life again. Also, it didn't help that original recipe the was in Japanese! Over the years, it disappeared from my mind but when making the dumplings last month, I suddenly remembered it again. So with help of an online translator and some guidance from a similar recipe I figured it all out. Some things are still a bit of a puzzle, for example the ear lobe texture description ended up in a feel and compare action but apart from that, they were easy to make.

The dumplings were great, stoggy with a nutty center thanks to the black sesame seed (available from most asian supermarkets) paste but in total still fresh thanks to the lime juice syrup. Perfect for the weather that is not summer nor spring/autumn.

Black sesame dumplings with lime syrup makes 8-10
For the syrup:
40 ml sparkling white wine
100 g sugar
juice of 1 lime
top up to 100 ml with water

For the dumpling:
120g glutinous rice flour
100g water
50g black sesame seeds
22g unsalted butter
28g sugar
pinch of salt

Grind the black sesame to a rough paste in a mortar or blender, then add the butter, sugar and salt and mix thoroughly. Put this into the freezer to harden so it's easier to make balls for the filling. In the mean time, combine water and sugar for the syrup, heat to melt the sugar and leave to cool, then add sparkling wine and lime juice. Make the dough by mixing flour and adding water gradually until it has the tenderness of the ear lobe (I love this sentence!). Divide into balls and roll out. Place some of the filling on top and close the ball. Boil in almost boiling water until they float then serve warm covered with the syrup.

Note: I ended up with less liquid than on the pictures of both recipes, it was ok but a little more would have been nice so next time I think I'll make 1.5-2x as much

Tuesday, July 10, 2007

Everything's peachy!

I know I know but I just couldn't resist the pun, just like I couldn't resist the huge box of peaches at Migros last Thursday. 3 kg for 4.90 chf (=£2.20;=€3)!!! now I couldn't walk past that. once home though I realized they needed to be eaten fast so we've had peaches for breakfast, lunch and dinner the last 5 days. Here are a few of the things we've enjoyed apart from just eating them as they are, sweet and juicy...

These little snacks were inspired on a dish Barry's mum served us for breakfast recently. A very unusual combination but I really like it. I topped a potato scones (or any type of bread) with cottage cheese and peaches that have been tossed with some white balsamic vinegar and basil. Very fresh and creamy.

Spicy poached peaches from the last issue of Marie Claire Idées (I love being able to just cycle to France to pick it up!). Very simply just boil some red wine with sugar, rosemary, vanilla and pepper for a few minutes. In the mean time peel the peaches and add them to the liquid for 10 min (if you want to peel them neatly you can put them into boiling water for a few minutes). Leave the peaches to cool in the liquid, then take them out and reduce the liquid to about half. Add a good glug of Crème de Cassis and pour over the peaches to serve.

Roasted peaches with lavender and lime mascarpone. Based on a recipe from the first Avoca cookbook, slice peaches in half, remove the stone and string the peaches onto some lavender (or rosemary) twigs. Then sprinkle with cane sugar and cognac and bake 15-20 min at 180°C. In the mean time, mix some mascarpone, lime zest and lavender sugar and spoon this into the hole from the stone.

And finally something we will enjoy in a few months a peach and ginger pickle from The perfect pickle book. Very simple to make with ginger, garlic, mustard seeds and red chilies but I'm sure it will taste great with a curry.

Wednesday, June 27, 2007

Finding Nemo, cocktail in hand...

So Blog party 23 hosted by Stephanie has the theme of Sci-Fi mixology. The inspiration I chose for this is perhaps not directly what you think about but somehow I couldn't get this image out of my head that I saw on a poster the other week. So my entry is based ona classic "science fiction" novel: twenty thousand leagues under the sea. Of course the famous captain Nemo was then reimmortalized by Disney a few years ago in the Finding Nemo movie.

So I use a pate brisee as a base, some egg whites flavored with lavender sugar (1 egg white-30g sugar put in a water bath at 100C in the oven for about 30 min) to make the ball and cut little fishes out of slices off peach. They were very easy to assemble and very pretty, if I do say so myself, although I think sweet finger food is perhaps not the best, they were more like petit fours.

The cocktail was based on this recipe made with homemade limoncello, sparkling white wine in stead of rose and I again used lavender sugar in stead of normal. This was really nice and I think, if the weather picks up we will be making this one a lot this summer.

Saturday, June 23, 2007

Waiter, there's something in my...Dumpling!


I was so excited when Johanna announced the theme for Waiter there's something in my....dumpling!! I've always loved them but never made them much. So I was contemplating which way to go and on our trip to Prague at the start of the month, I found my inspiration. Just off the Old town square we saw a string with some funny looking rolls around it and as we were in desperate need of a drink and snack after seeing all the beautiful architecture we sat down. They were called Staroceske Trdlo and are made of sweet yeasty dough, rolled around a metal ring and into a mix of ground almonds and sugar. This is then roasted over gas and eaten warm. They were so yummy, and we had quite a few over the weekend to keep the energy up with all the sight seeing.

So I decided to make a dumpling covered in this mixture, but to make it a little bit more special I filled it with half an apricot, a bit of sugar, almonds and ginger (inspired by these tarts that I've made lots). They were a breeze to put together although I was a bit surprised how big they became and we ended up eating way too much but tasted great. I liked the little hint of ginger, the freshness of the apricot and the caramely sugar on the outside. I think I'll be embarking on a dumpling filled summer after this!

Apricot, ginger and almond dumpling (makes 8 fairly big ones)

For the dough
400 g flour
50 gr fresh yeast or 1 sachet dried
1 tsp sugar
about 200 ml milk
pinch of salt

For the filling:
4 apricots
1 tbsp sugar
1 tbsp roughly ground almonds
1 tsp ground ginger

For the outside:
a mix of 2 part sugar, 1 part ground almonds

Put the flour into a bowl, mix the sugar and salt in and crumble the yeast into it. Add the fluid and work till you have a nice soft, springy dough. Cover and leave to rise for about 1 hour (if in a rush, fill the sink with lukewarm water and leave the dough in that for 30 min) then divide into 8 pieces and roll them out into a circle. Cut the apricots in half and mix the sugar, ground almonds and ginger together. Put half an apricot onto each piece of dough and fill the place of the stone with the ginger mixture. Roll into the dough and leave to rest for 5-10 min. In this time, bring a big pan of water to the bowl. Add the dumplings and boil for about 8-10 min, lift out and roll in the sugar-almond mix. Enjoy whilst still warm.

Sunday, June 10, 2007

Sunken fudge

Hurrah...the second browniebabe of the month is here! I was gutted to miss the first one hosted by Myriam but have made it in time for this one. Brownies have always been a permanent fixture in my family. I've been making them since I was little, they would be the cake I would bring to school on my birthday for the class (Dutch tradition), bake on holidays and pretty much any occasion I would get the chance. The original recipe came from a German colleague of my Dad and the proportions are etched into my memory. Sometimes I would add some walnuts or perhaps some crystalized orange but in general I was a purist brownie person. Why change the best recipe there is?

Then about a year ago, I had to eat my words and another brownie. One of the girls in work brought some in and they were delicious! So I got over my pride and asked her for the recipe. It was an old news paper article with many vairations. I moved it around, put it in different folders but never quite got myself to make them. Then I figured this would be the perfect event, I would experiment and use this basic recipe. To feel a bit less like a traitor, I opted for a blondie variety. I decided on a lemongrass blondie with fudgy bits inside, a great idea in my head but it still needs some tweaking. The taste was great but they were a bit too springy. Probably something to do with too much baking powder as I only had plain flour. In addition all the fudgy bits sunk to the bottom making it tricky to get them out of the pan. Next time I will add these halfway through the baking process along with some of the lemongrass. I grated 5 sticks (with my amazing new microplane grater!!) and even though it tasted lemony I think I would like the taste to be a bit more pronounced. So all in all, a good first attempt, but not quite enough to make me leave my old and trusted recipe :-)

Lemongrass blondie with fudgy bits
100g white chocolate
100g butter
225g sugar
130g flour
1 level tsp baking powder
1/2 tsp vanilla extract
3 eggs
tube of sweetened condensed milk (300g)
salt to taste
5 stalks of lemongrass, grated

Heat a frying pan over medium heat, when hot, pour in the sweetened condensed milk along with the salt (depending on how salty you want your caramel-I used 1 1/2 tsp to counteract with the sweet white chocolate). Stir continuously until it becomes a caramel colored ball that comes clear from the sides. Test a little bit on a plate to see how solid it is, if too hard, add a bit of water. Allow to cool and cut into pieces. Preheat the oven to 180°C. Boil water in a pan, take off the heat and put the butter and chocolate in a bowl over the pan and stir to melt. Stir in sugar, sift flour and baking powder on top and add 3/4 of the lemongrass. In a seperate bowl, beat the vanilla extract with the eggs and stir this in. Pour into a greased tin and bake for 15 min, then add in the fudge and bake for another 15-25 min. If necessarry, cover the brownies with parchment paper when they get too brown. Take out of the oven and after 10 min, turn out onto a cooling rack

Monday, May 07, 2007

A Taste of Yellow


Having lost my grandparents and family friends to cancer I figured this was a very worthwhile event to take part in. I have so much respect for people who have to deal with this every day. For this occasion I made a passion fruit tart based on a recipe from this book. Very simple to make and with a sweet zingy taste this beautiful yellow tart would brighten anybody's day!

Passion fruit tart serves 8
*for the pastry
200g plain flour
100g butter
75g sugar
pinch of salt
water

*for the filling
150 ml double cream
100g caster sugar
200 ml passion fruit pulp (about 9 fruits)
4 eggs
icing sugar, for caramelizing

Mix together flour, butter, sugar and salt till you have a crumbly mixture. Then add water until it comes together into a firm dough. Wrap this in cling film and place in the fridge for about 30 min-1 hour. Preheat the over to 190C, grease a 20cm tart tin and cover with the rolled out pastry. Prick the base with a fork, cover with baking paper and fill with beans. Bake 10 min, then remove the beans and bake another 5 min or until golden. Take out of the oven and reduce the temperature to 140C. Warm the cream in a small pan. In a large bowl, whisk the butter, sugar and passion fruit pulp , then whisk in the eggs. Finally, add the pre-warmed cream and pass everything through a sieve to get rid of the seeds (press these down well to get as much juice from them). Pour the mixture into the tray and bake 50-55 min or until the filling is just firm at the edge but still wobbly in the centre. Leave to cool completely, remove from the tin and chill for several hours to allow the centre to firm. Just before serving, dust the surface with icing sugar and place it under a hot grill to caramelize and make a thin, golden glaze.

Saturday, March 17, 2007

Green

St. Pat's Day: Green or Irish
My family has had an affinity with green for a long time. It started with a birthday present for my dad about 10 years ago. My mum bought him tiny green glasses (he has always liked glass in general) in the antiques shop which had the most vibrant color. It's a really in your face, limy, fluorescent kind of green and really after some research we found out it is called Anna green, was made at the start of the 20th century and is produced using very slight amounts of uranium oxide (this makes the vibrant color). My dad being physicist loved this even more and so started the collection.Over the years they have accumulated quite a lot of small pieces and it has gotten to a stage where non of us can go to a second hand shop/ flea market/ garage sale without looking for it and then, when you find a possible one, deciding if it really is or not, or perhaps once with less uranium, or just a dye etc.

But with a irish boyfriend the love for green reaches a whole new level. Not only is he a keen glass hunter but he is convinced it's the best color in the world (and why would people think otherwise)! When we were furnishing our new apartment in Basel, he would have bought everything in green if he had the chance (furniture/bedlinnnen/towels/appliances) so in the end we compromise on a green couch (which I secretly love, but don't tell him!) and 3 green chairs. Don't get me wrong, I like the color, but more in plants or when I'm outside in a forrest or the mountains. But today, I thought I'd make a gesture as it's St Patrick's day! St Patrick, who was originally Welsh, came to Ireland to chase the snakes (devil) away and bring christianity to the island. For the Irish it's a great excuse to wear their national color and enjoy a few pints of Guinness.

Over on Kochtopf, they also felt patriotic about today I decided to bake something for the event. I stuck with the green color and made a green baked cheesecake. It's very lightly based on a green chocolate mousse my mum makes (and we actually eat out of the green glass) which is made with white chocolate and creme de menthe. I really like it but somehow felt it was a bit to delicate and light for the occasion (how are you meant to hold your Guinness on that?!). Instead, I made a base using a mix of chocolate biscuits and ginger nuts and added a few teaspoons of creme de menthe to the cheese part. It didn't become as vibrant green as I had hoped but after being in the oven, the green was more pronounced in a velvety green tone. The tart was lovely and creamy with a hint of mint. I liked the taste but next time I think I will add something to the cheesemix to give it a bit more texture.

Minty Leprauchaun Cheesecake (serves 4-6)
100g biscuits (mixed gingernuts and chocolate biscuits)
50g butter
1 egg +1 yolk
350g cream cheese (the proper stuff-light just doesn't set as well)
90g sugar
1/2 tsp vanilla essence
2 Tbsp creme de menthe

Crumble the biscuits, melt the butter and mix these two together and spread over the bottom of a pie dish. Then whisk the eggs, cream cheese and sugar till it's creamy, then add the essence and the creme de menthe. Spread it on top of the base and bake roughly 45 min. Leave to cool in the oven, then place in fridge for at least 2 hours preferably overnight.

Tuesday, February 20, 2007

Easy peasy lemon squeezey

It's very easy to squeeze lemons, but what to do with them afterwards....The warm weekend (20C on our balcony!) brought the promise of late summer evenings sitting outside, enjoying good food and company. One of the things I love drinking at these times is limonchello. I made some last year which was very successful so I decided to try again, this time using this recipe. Even making half the amount, I still ended up with 8 lemons so what to do with them? I went a bit mad and decided to try all the lemon recipes I've been wanting to try for a long time. First we made a lemon tart with meringue. As I was lazy I used puff pastry for the base which was fine, but I think it would have been much nicer with a proper crust. It was still very tasty though and a good oportunity to use Barry's new favourite toy - the blowtorch.

As I really liked the filling, I decided to make some lemon curd, which is similar and can be used as a filling for pastry cases. I adapted this recipe as I was intrigued by the use of almonds. However, I didnt have any zest left, and I wasnt about to use more lemons, I just increased the amount of juice. I also reduced the amount of sugar as I often find lemon curd too sweet. The curd was great, at first I wasn't so sure about the almond powder but as we had brunch on our balcony in the sunshine it really began to grow on me. It gives a little "je ne sais quoi" to the curd, somehow it becomes more velvety and soft.

As the ground almonds I had were fairly mixed, I had to sieve them to get the fine stuff for the curd, with the rest, I made another recipe from this site for lemon fleur de sel cookies (again without zest and with slightly more juice). I was keen to try some fleur de sel de guerande that barry's uncle and aunt had kindly given to me. Tasting the dough initially, I didn't really taste so much salt but once they were baked, you would run into little salty bits. These are really nice with a cup of tea and a good book, plus they look great in my new cookie tin. This was a present from a Dutch friend from a shop in Amsterdam and they are a modern take on Delft Blue. They're very pretty and if you want, you can get your products customized for you.

Finally with the last dregs of the juice I made some blood orange marmalade which looks beautiful. Unfortunatly, when I poured it into the jars, all the skinny bits floated to the top. It still tastes good but not quite as pretty. Does anyone have any ideas/tips about this??

So a busy weekend in the kitchen but it actually wasn't so bad. All the recipes are very easy and straightforward, they dont't take much time to make (fair enought the marmalade takes long but doesn't need much attention) are all very tasty.

Thursday, February 01, 2007

Thursday already....

I can't believe it's thursday already, time flies when you're having fun (or working 11 hour days). Last weekend we were meant to go skiing with my work but this trip got cancled as there has been so little snow in the mountains although this week made up for it. Instead fridaynight we enjoyed a great fondue at a very nice restaurant. It is a traditional place where a lot of quilds and studentassociations still meet. I like fondues as they are a very social and simple kind of meal. But the real surprise was dessert, I chose a lackerli mousse. These are traditional Basel biscuits that are normally quite hard and chewy so this could go either be lovely or go horribly wrong.....but it tasted great. It still had that lackerli chewiness but was nice and airy....I'll definitly go back for that again.

The next day we went to see the Vogelgryff, this is an old Basel tradition (started in the 13th century) based on the rivalry between the north and south part of the city. A raft carries a wild man, a lion and a griffin down the river, which come to the bridge and then dance around with their back towards south Basel. It was very nice, but very busy, with lots of kids so I recommend coming early to get a spot at the middle of the bridge.

Then I went to pick up my brand new ski's (early birthday present) which we went to test out on sunday. Barry, Simone and I went to Engelberg for a bit of skiing. Two hours by train later, we were on the slopes and had a fab day in the sun, although we could have done with a bit more snow. The days was also filled with hazards as you can read in this post. What Barry failed to mention is that coming off our first lift in the morning, he made it impossible for me to get out which meant I fell down the side of the lift (±3m)!!! Luckily I landed in a big pile of fluffy powder. In addition, I had to spend the whole afternoon skiing with his one bent pole. But it's worth it if he comes skiing more often!

Once back in Basel, we treated ourselves to a tropical dessert using Barry's latest Christmas present. He got a blowtorch for cooking so we made a lovely mango creme brulee based on recipe in a Malaysian dessert book I received with a blogging by post package a while ago. I liked the idea of using fruitpuree in stead of cream as still trying to be sensible with eating to much fat. The creme turned out really rich, which was nice and had a lovely crispy topping. We'll definitly be making this one again, specially as everything I cook at the moment Barry wants to blowtorch!! fire extinguisher anyone?!

Mango creme brulee (serves 6)
2 eggs
30g sugar (plus extra on top)
1/2 teaspoon of vanilla essence
250 ml mango puree

Beat the eggs, sugar and vanilla essence until creamy. Add the mango puree and stir thoroughly. Pour this into molds, bake 30 min at 170C until golden on top. Remove from the oven and allow to cool (they will sink quite a bit so make sure your molds are nice and full). Sprinkle some sugar on top and melt/caramalize this with the blowtorch (or place under the grill).

Friday, January 26, 2007

Museums, bread and chocolate

So many things to write about and already it's Friday....so I'll just do a quick recap of the last weekend. Fridaynight was Museumnight in Basel. From 18:00 to 2:00 you can access any museum in Basel and travel between them for 20chf. So we decided to make the most of it and visited a whole array of places. It was a great opportunity to have a quick glance in a lot of places. First we went to the Tingely museum, had dinner there, then visited the Kunstmuseum, Culture museum, Pharmacy museum, Botanical gardens and more....but the most impressive was a Hydan concert in the Munster where you could listen from the gallery.

The next morning, I got up early to meet a friend across town where we spent the morning at a breadbacking course. We had a great time abd even though I've baked a lot of bread before I picked up some interresting tricks. For example, you can accelerate the rising process by putting the dough in a sink filled with luke warm water or a 50 degrees Celsius ove which you then turn off. Also, to get a nice crust, it't the tension in the surface of dought that's important. The format was very nice where everyone (12 people total) made a different bread with 500g flour which we devided in half. One half we had for lunch and one we got to take home. Then we all learned to make zopf and took that home as well.

Finally, as part of being back from limbo, I figuered I should take part in some of the blogger events again and what better way to start then with SHF#27 hosted by David. However, I got my deadlines mixed and thought it was today instead of last friday. Doh! But it was a great opportunity to finally make some macarons....having read about them for the last few years and am ashamed to admit that I've never had a real one. I followed this recipe and even though it took a lot more work then I thought but they turned out really great. I tweaked the filling slightly to include goji berries, an inspiration that came from here. I soaked the berries while the biscuits were drying. For the chocolate, I used Droste cacao (I'm a dutch girl after all....plus I think this chocolate is highly underrated) and Lindt Excellence 85% Dark Chocolate. The result was amazing, really dark chocolat, not to sweet, a but chewy in the middle and the occasional berry for altered texture. My only dissapointment were the tops that were all cracked instead of being round and glossy....prehaps I should have left to dry them longer? Anyway, this is definitly a keeper but I'll have to go and try the real thing soon!